Tool Started 4-18-14. Last Updated 4-19-14 Apologies. This post is in progress. I can't find where to hide it while being developed, so I thought I would rush and add some content over the next few days.
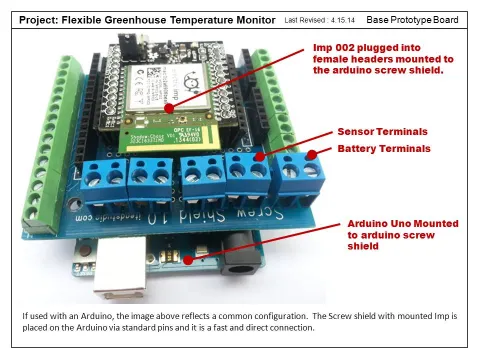
Make note that the Arduino screw shield is not required. An electric imp however is required. Without the Arduino screw shield, you can make this complete circuit and start harvesting temperatures wherever you have internet access.
This unit is currently deployed and recording greenhouse temperatures. As mentioned, a better explanation will soon be provided regarding how to build one yourself. For now, if you would like to try this, send me an email requesting the Imp code files. Email glynnbebee "at" gmail.com.
Development is ongoing and happening quickly. If you want to help us fasttrack this project, we would welcome assistance with...
- Custom PCB connection board design and production. I have a few NEMA weatherproof enclosures in mind.
- Development of a custom online/mobile device app for visualization of the Xively data
- Assembling a group order (10 or 100 units) for development of the custom PCB board (if interested, please contact us)
- Assistance writing code for the Imp and Arduino which will enable communication
Title Wireless Remote Temperature Monitor (with Optional Arduino Interface)
Problem Most affordable commercially-available options for remote monitoring of temperature are proprietary, inflexible and often offer monitoring of a limited number of data streams. Because the systems are proprietary, you also lose the ability to develop better features like remote control of pumps, micro controller monitoring at the device location, and the ability to use a variety of sensors to monitor a variety of environmental conditions.
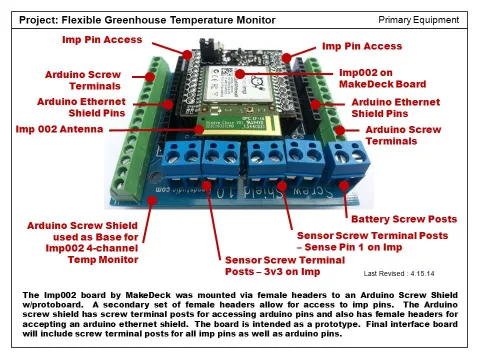
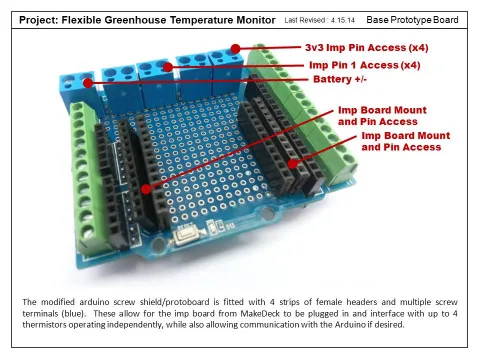
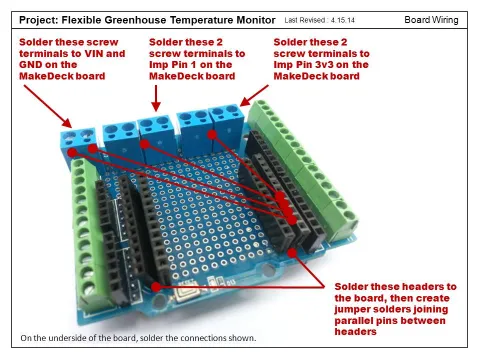
Functional Description/Approach This tutorial will explain how to use the Electric Imp to monitor temperatures remotely via the internet. We used the Imp002 model on a board designed and sold by The MakeDeck. Rather than mount the circuit on a standard proto board, we made ours on an Arduino screw shield. This allows Arduino programmers to use the Electric Imp for wireless connections, where desired. However, this tutorial will only explain how to use the Imp hardware to record and post temperature information online.
How To Use The Tool The device is designed to be portable and fit in a variety of enclosures of your own desire. Our prototype used a plastic floodlight case. The Electric Imp code provided is optimized for battery use, enabling flexible wireless monitoring in a variety of locations. The Electric Imp has impressive wi-fi range.
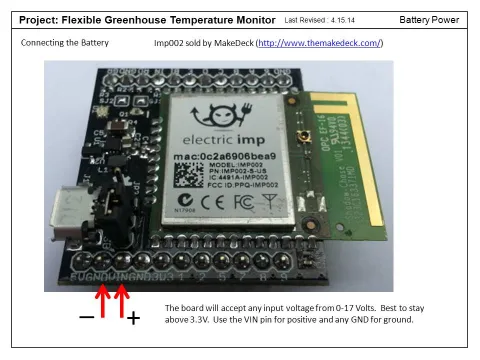
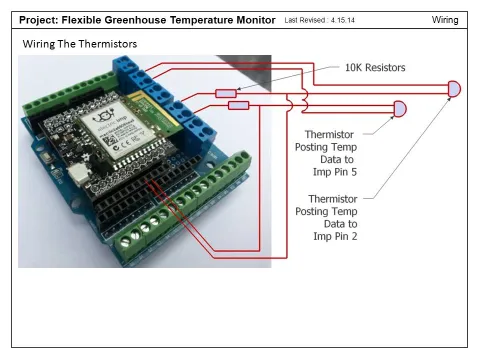
Bill of Materials and Sourcing 1 x MakeDeck P3V3 board 3 x Double Screw Terminals for .1" protoboards 1 x Arduino screw shield 1 - 4 Thermistors 1 - 4 10K Resistors 1 x Battery and holder or wiring (0-17v input voltage on MakeDeck board) wire solder
Construction/How to Build What you'll need to build and commission your device:
- Android or iPhone Smart Phone
- Android or iPhone electric imp app (free)
- Micro-USB Cable for easier blinkup of the imp (I find that batteries can have trouble sometimes providing enough power for blinkup
- Wireless Router SSID and password
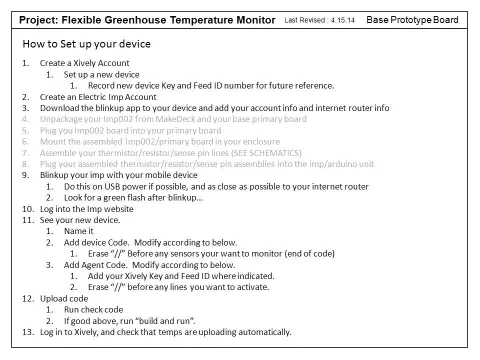
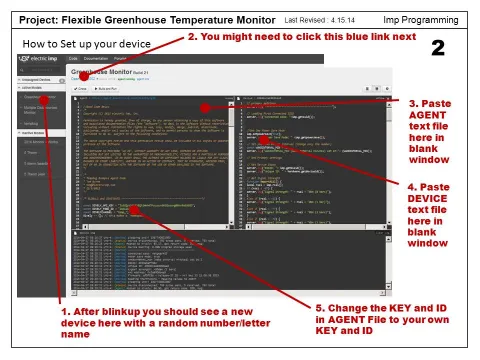
- An account with electric imp for accessing the imp and programming through the IDE
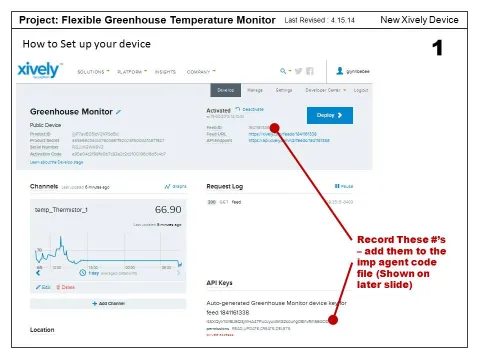
- An account with Xively for recording and displaying temperature measurements online
Next steps/goals/barriers Soon
Ongoing projects Soon