I am a farmer and I want a tool to firm seedbeds after rotovating / tilthing because seeds & seedlings need good contact with soil.


Modelled on commercial roller available form Jonny's Seedbed roller
https://www.johnnyseeds.com/tools-supplies/long-handled-tools/seed-bed-rollers/johnnys-seedbed-roller-30%22-7219.htm
I wanted to create a roller with a very specific circumference easily divisible by 4,6,12@ to enable dibblers to fit into the 1" mesh and mark holes for stransplants.
Materials = approximate price = Total £200
1 sheet of galvanised mesh 1" holes 1.5mm wire = £30
Market Stall clips for dibblers6" spring loaded clips = £0.70/each
650B Front bike wheel x2 = £75
Solid rod for axel = £(not sure)
Angle Iron and scraps for handle = potentially free from shelving unit
Stainless steel cabel ties = £10
Nuts and bolts £5
Tools
Angle Grinder
Cable Tie tightening tool
File
Tap and die set
Electric drill driver
The mesh seedbed roller/dibbler manufactured by Johnny's Select Seeds in the United States(Jonny’s Seedbed Roller) looked like a great multifunctional tool but seemed a ridiculous thing to airfreight. I would estimate the roller would cost around £350 to import once you include freight and import tax. That is without any dibbles to mark out with. If you wanted to dibble 4 rows of 4” spaced holes using the larger dibbles, requiring 36 dibbles it would cost roughly another £300. I guessed there must a simple DIY way to make an equivalent device.
This is how we made one (big thanks to our volunteer Simon who did a lot of work on this as well as my farther and uncle who contributed!)
The function of the seedbed roller is to firm the seedbed after cultivation, leveling the surface in preparation for direct seeding or transplanting. The use of a mesh roller to firm the cultivated soil is advantageous over a solid drum which can create a hardpan on the surface. The mesh even breaks the surface into a finer crumb for good seed to soil contact. The additional function of the mesh roller is the ability to mark out or even dibble holes into a prepared bed ready for transplants, eliminating the substantial task of digging transplant holes. The dibbers are clipped into the 1” mesh at known spacing to mark transplant holes at your desired spacing.
The circumference of the roller is very important and is set to be divisible by the most common spacings of 4” 6” 12” using the 1” mesh. Elliot Coleman suggests a 11.5” diameter roller that gives approximately 36” circumference. The Jonny’s model has 6 wheels inside 3 independent segments of the roller enabling turning without digging ruts in the end of your bed (very fancy)!
Bike wheels seemed like the obvious starting point and I found a website with useful wheel size charts – https://www.sheldonbrown.com/rim-sizing.html – the important info is the bead seat circumference. I was initially focused on copying the Jonny model and so I made my first prototype using wheels as close to 36” circumference as possible. I used a child’s wheel with outer circumference of 37.7” and I spent a long time and many grinding disks cutting the rims off to reduce the circumference. I cut it as far as structurally possible and it was still a couple of inches too large. It turns out that bike rims are actually a strip/tape of metal connected to make a circle and when I cut so much off the rims the two ends disconnected making the wheel completely useless. In the end I trimmed a bit off the end of this strip of rim metal and bolted it back together to make a circle again. This gave me close to the right circumference but still a little large. This resulted in a slightly larger spacing between one transplant hole per rotation. I calculated this would lose a meter or so of transplants per bed so not great but worth a go.
I discovered re-usable stainless steel cable ties (yes these exist! There is a great tool to tighten them extra tight and cut any excess off in one motion) to strap galvanised 1” mesh to two wheels. A connecting rod between the two wheel axels was made from a solid rod with drilled holes at each end with a thread tapped into this for a solid bike axle (3/8 inch x 26 tpi). My Uncle did this for me as he is a blacksmith and I guess most people would need to find a metal/machine worker to do this for them. For mark one I only had two bike wheels of the right size and enough mesh to make a 15” width roll so this is what I did.
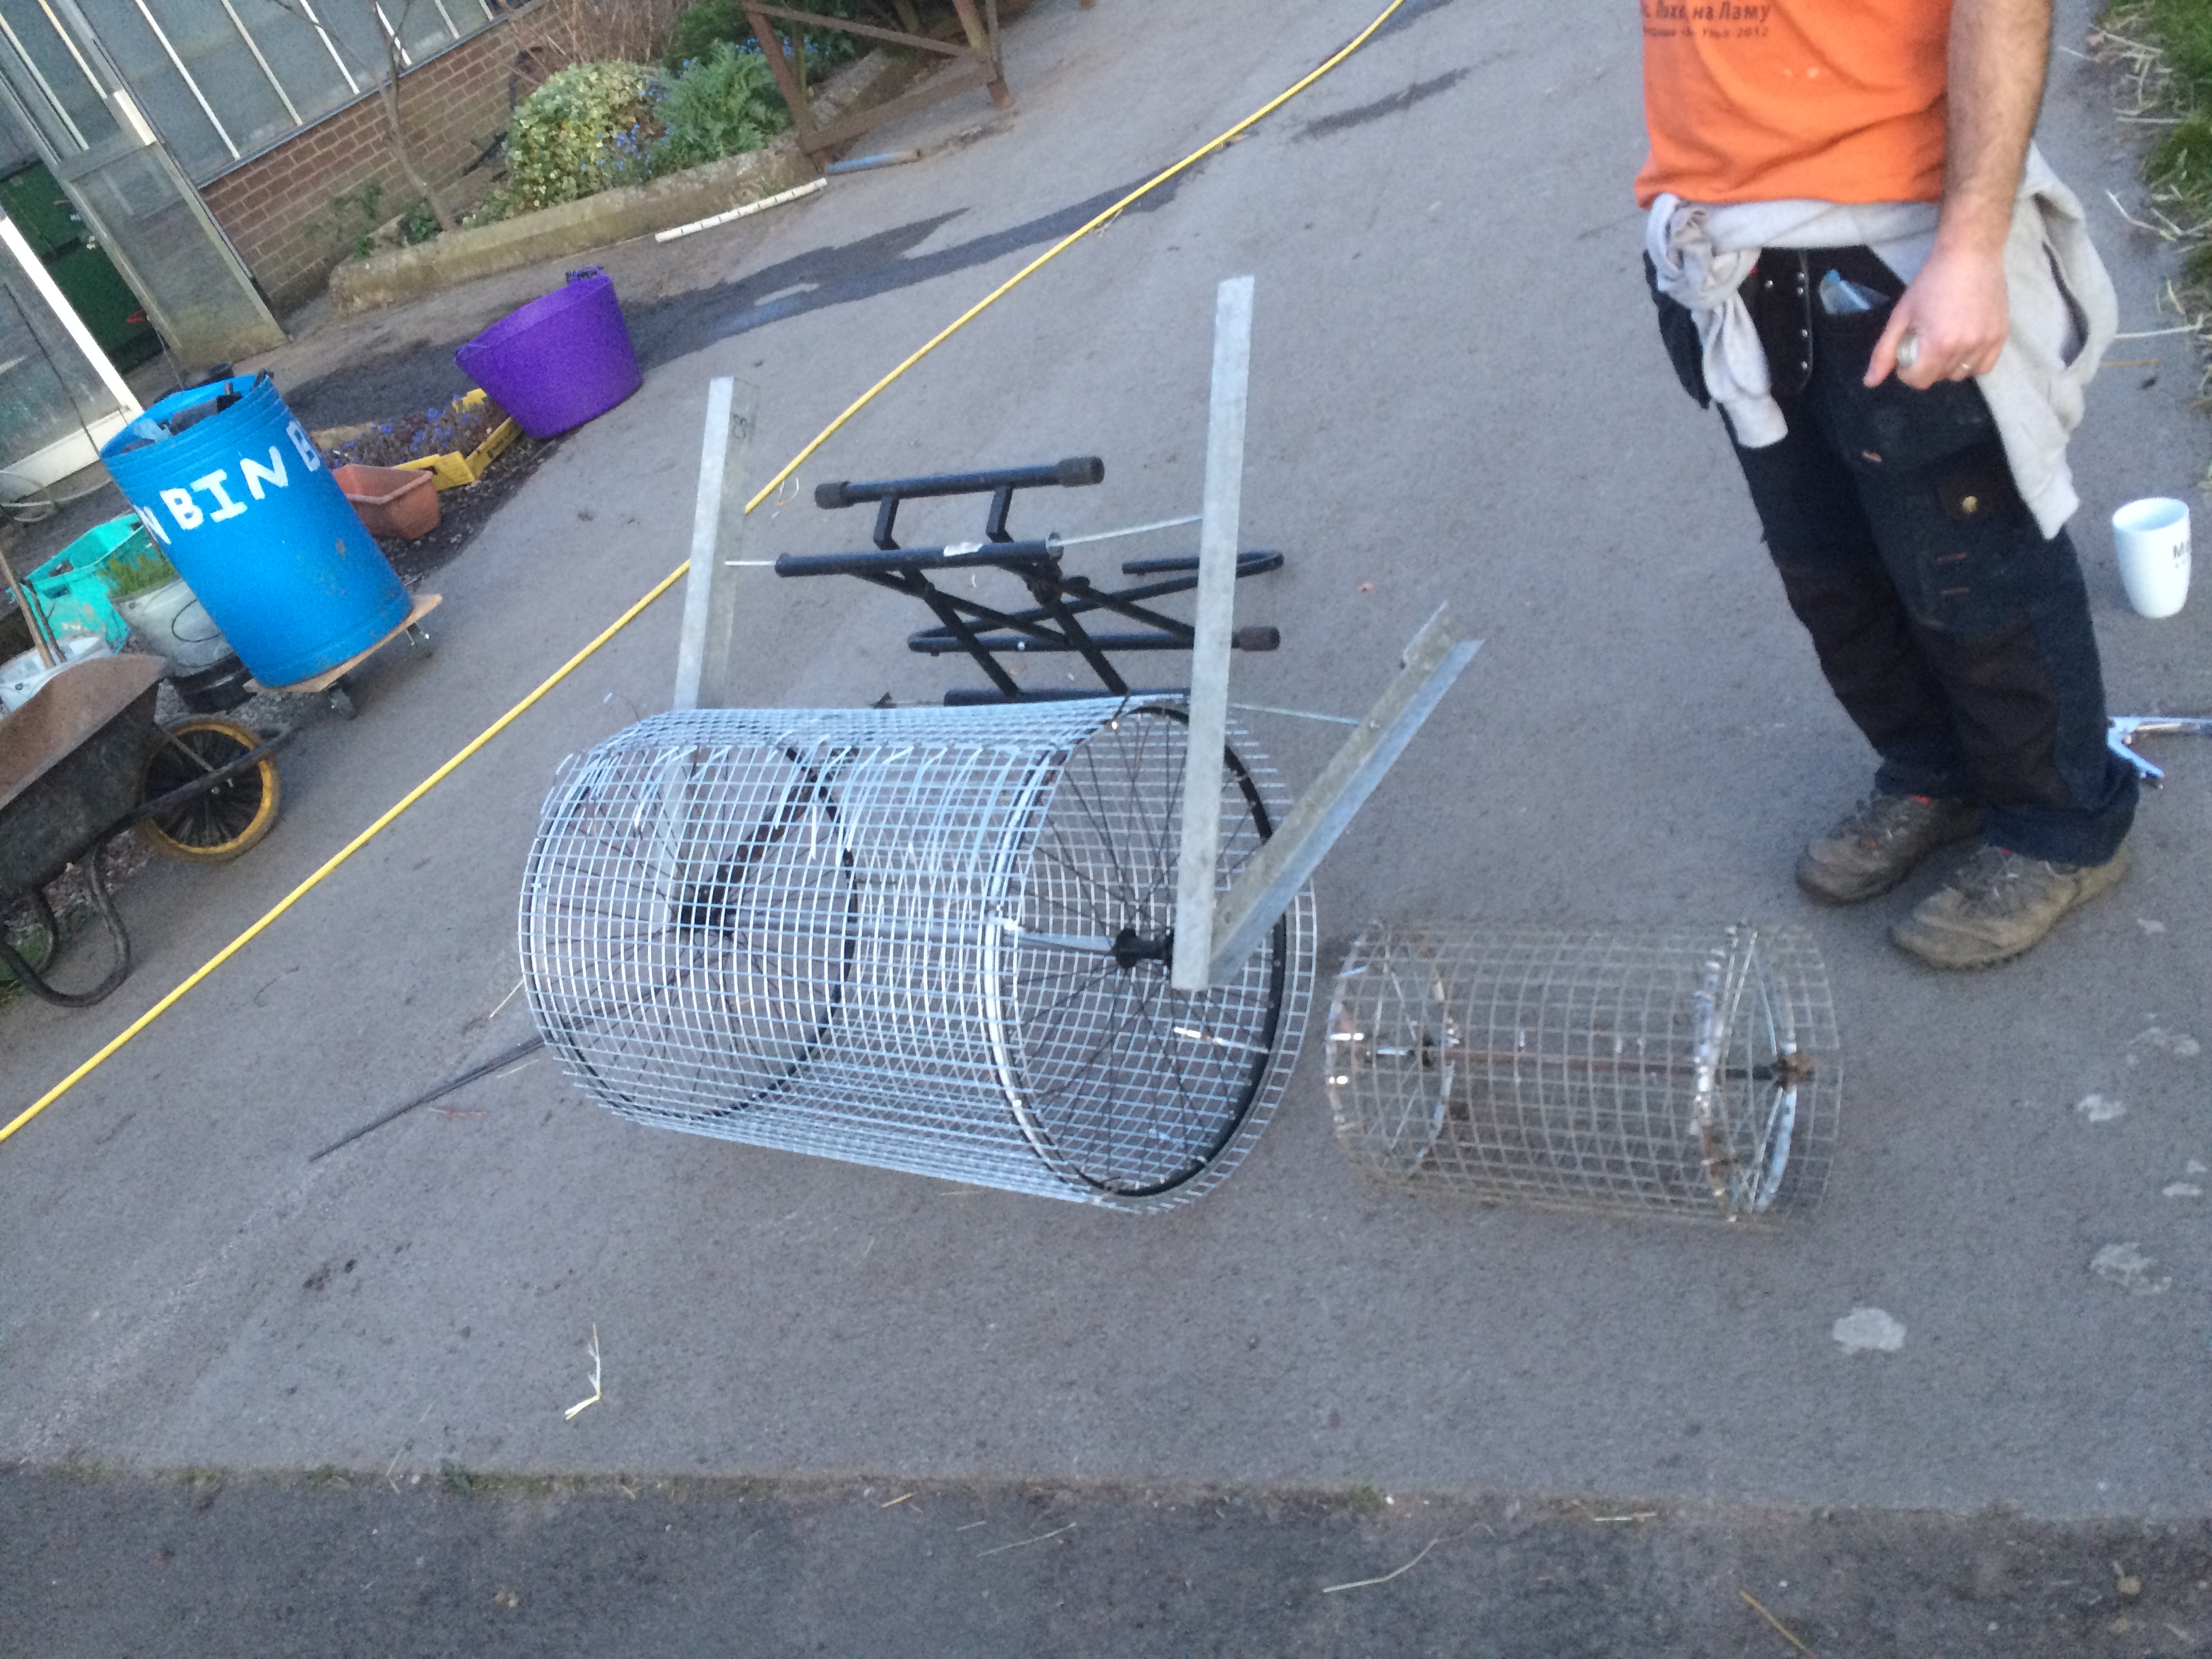
The frame and handle are bolted to to the outer thread of the bike wheel axles using a usual bike nut. The handle was cobbled together with things I had to hand (a keyboard stand) but it is effectively stainless steel tubes straddling the angle-iron. (Angle-iron is a common material used to support upright metal a shelving units). The strength is achieved by running a long threaded rod inside a strong metal tube and bolting ether end with a large washer against the angle-iron.
It worked ok, made a smooth firm finish on half the bed but it was unstable with the concrete block on-top and narrow in width so it fell over easily and was hard to control. Attaching the weights to the outside of the frame at the height of the axel made a big difference to the stability, however I was disappointed to only have 15” width for our 30” beds.
Keen to try dibbling I decided to start by importing the manufactured dibblers from Jonny’s in the United States as I couldn’t see how to make my own. Also with a half size roller it was going to be half the price… Still the bill was painful, working out around £7.30 a piece! They also did not function that great…. I found it much harder to push the roller smoothly and it would often skid forwards distorting the spacing. They also seemed to fall out easily and got left in the soil often. This is because they are only held by two small tabs and due to the natural spring in the metal. Overall it was a bit disappointing. The concept still seemed good and I was excited by the potential. I was sure there was a way to make a spring loaded dibbler, I just needed to find an analogous component readily available. I contemplated this for a while looking around for inspiration.
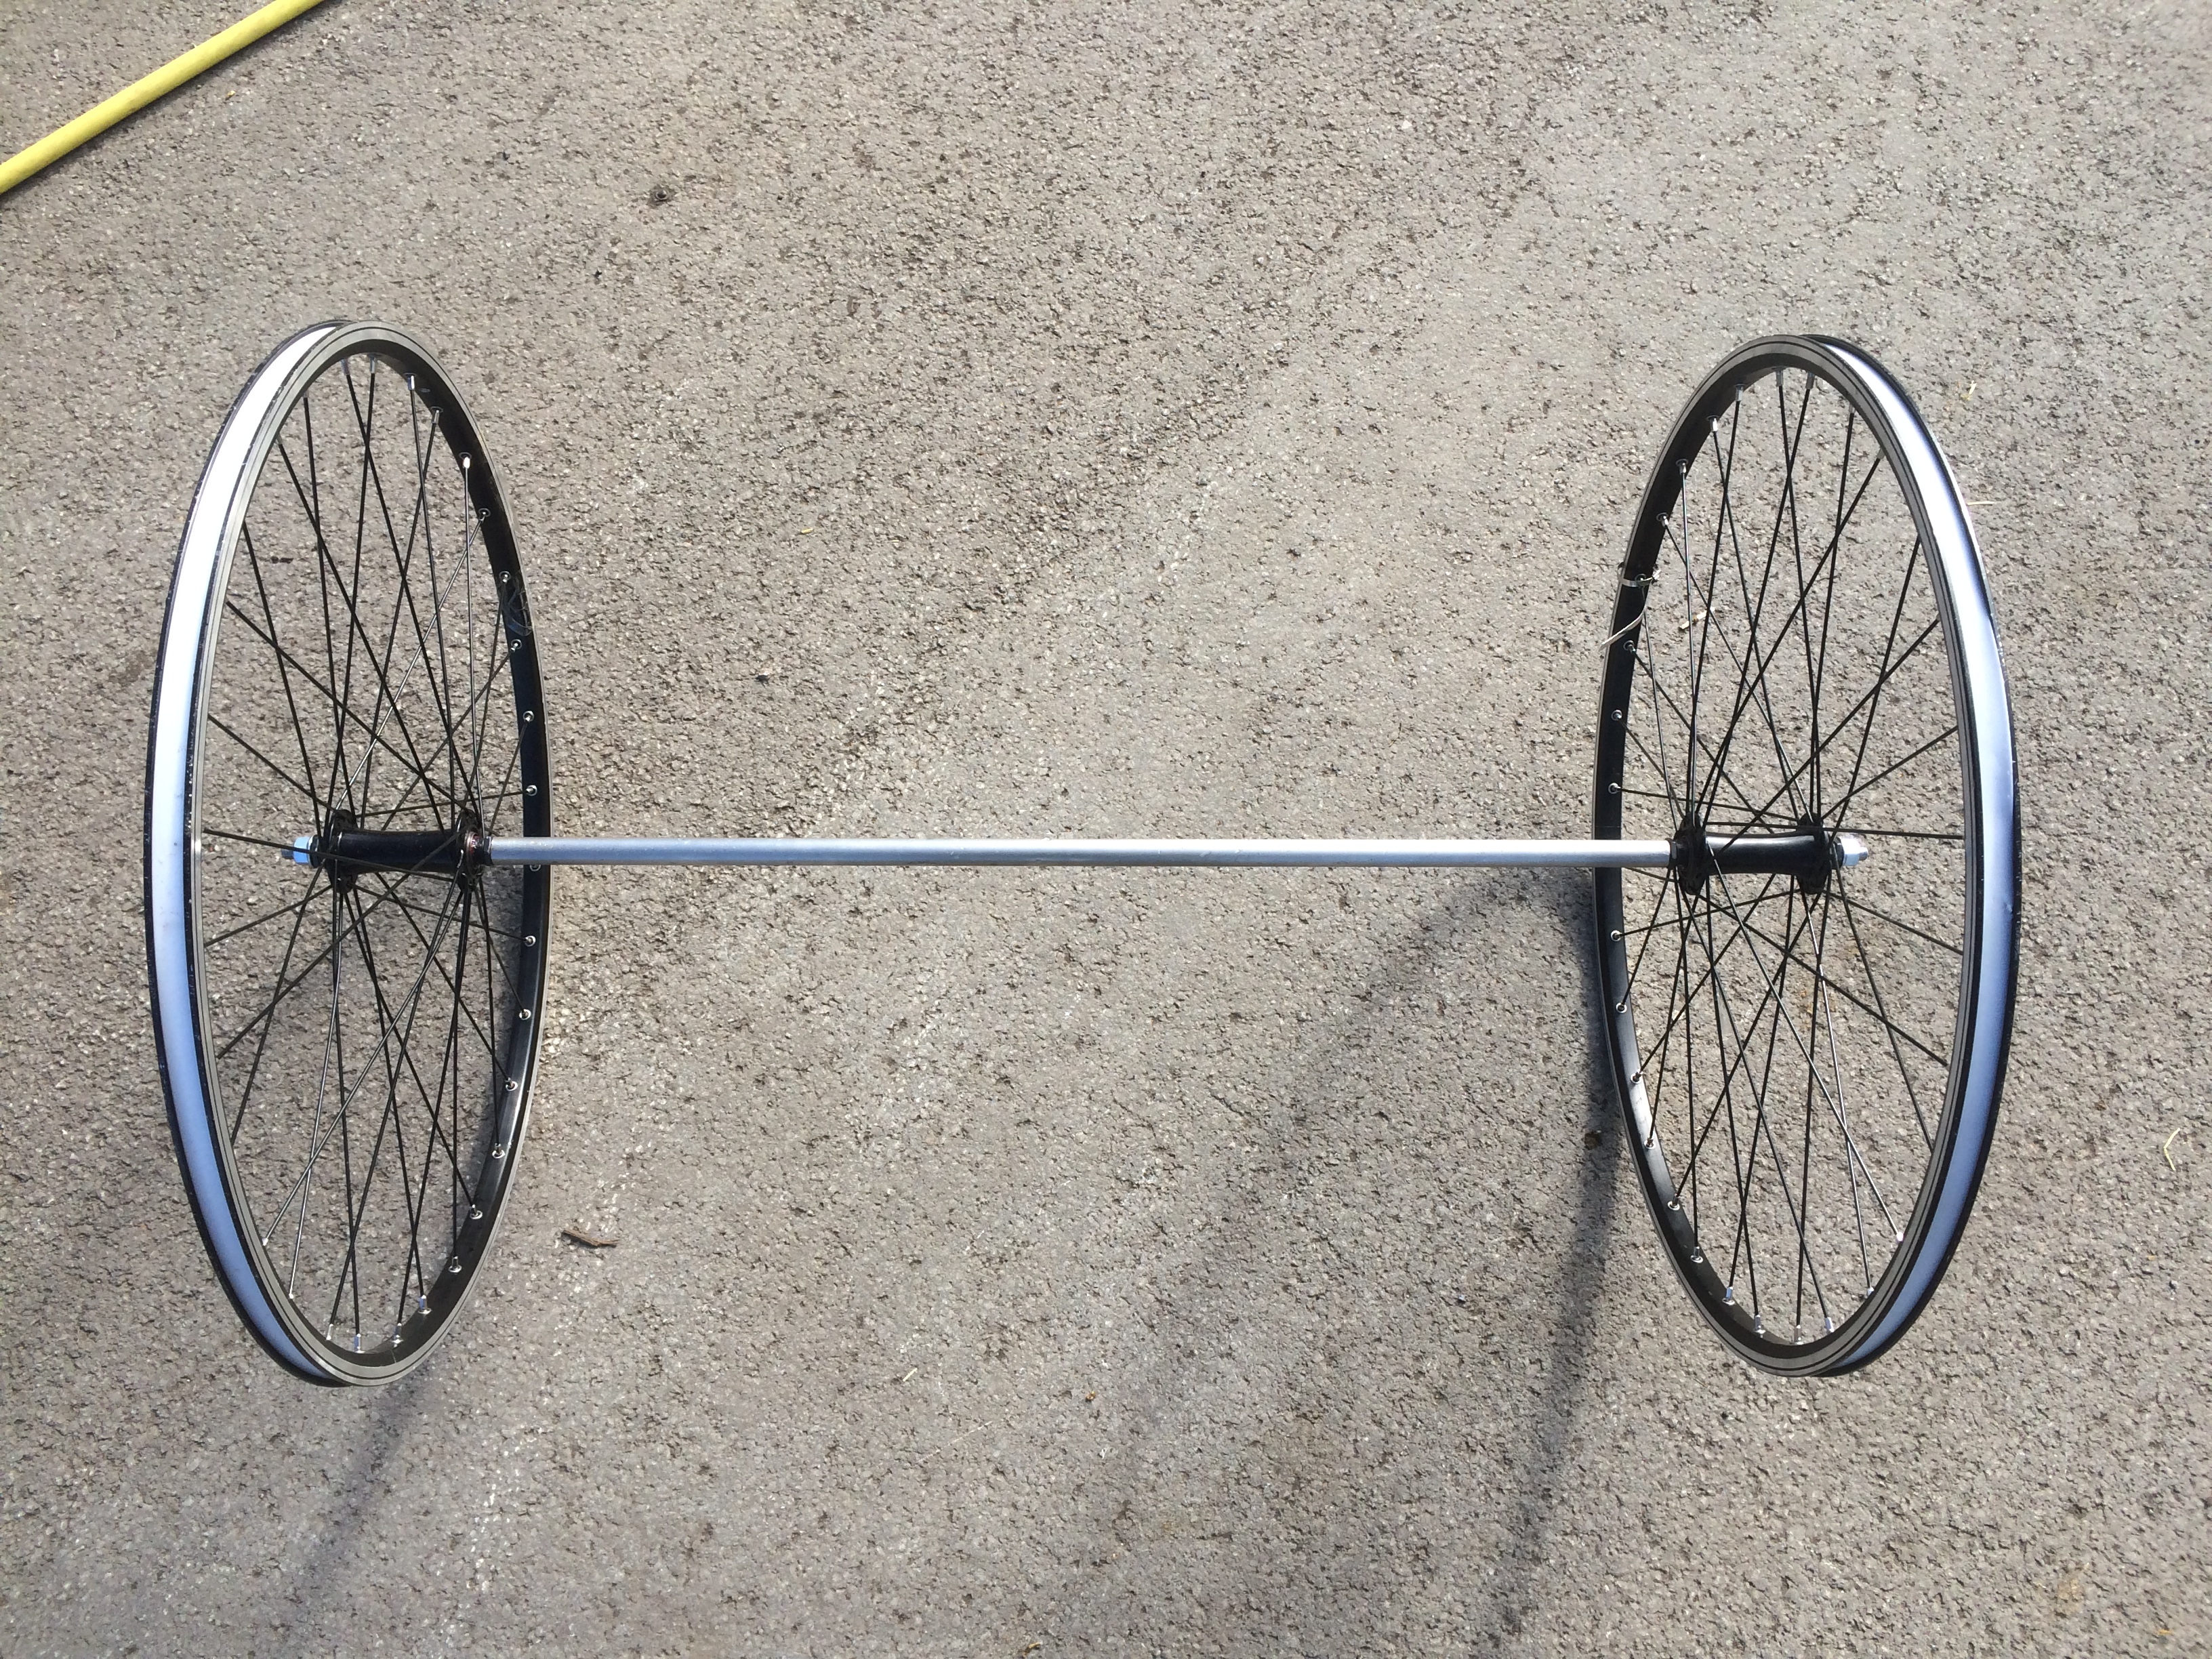
Meanwhile my dad suggested that a larger circumference roller would direct more vertical force onto the dibber and into the soil which should reduce the skidding and require less weight for the same compression. I studied the wheel sizing charts again and discovered that a 650B road wheel is double the circumference of the Jonny’s seedbed roller 72.2”. Unfortunately 650B wheels are an unusual wheel size used on smaller adult racing bikes so finding second hand wheels seemed impossible. Fortunately decathlon sell a fairly budget 650B road wheel and a pair of front wheels cost me £75 all in. https://www.decathlon.co.uk/p/650-road-bike-front-wheel-black/_/R-p-X8360178. I replaced the quick release axles for solid axles (for strength) from the local bike shop.
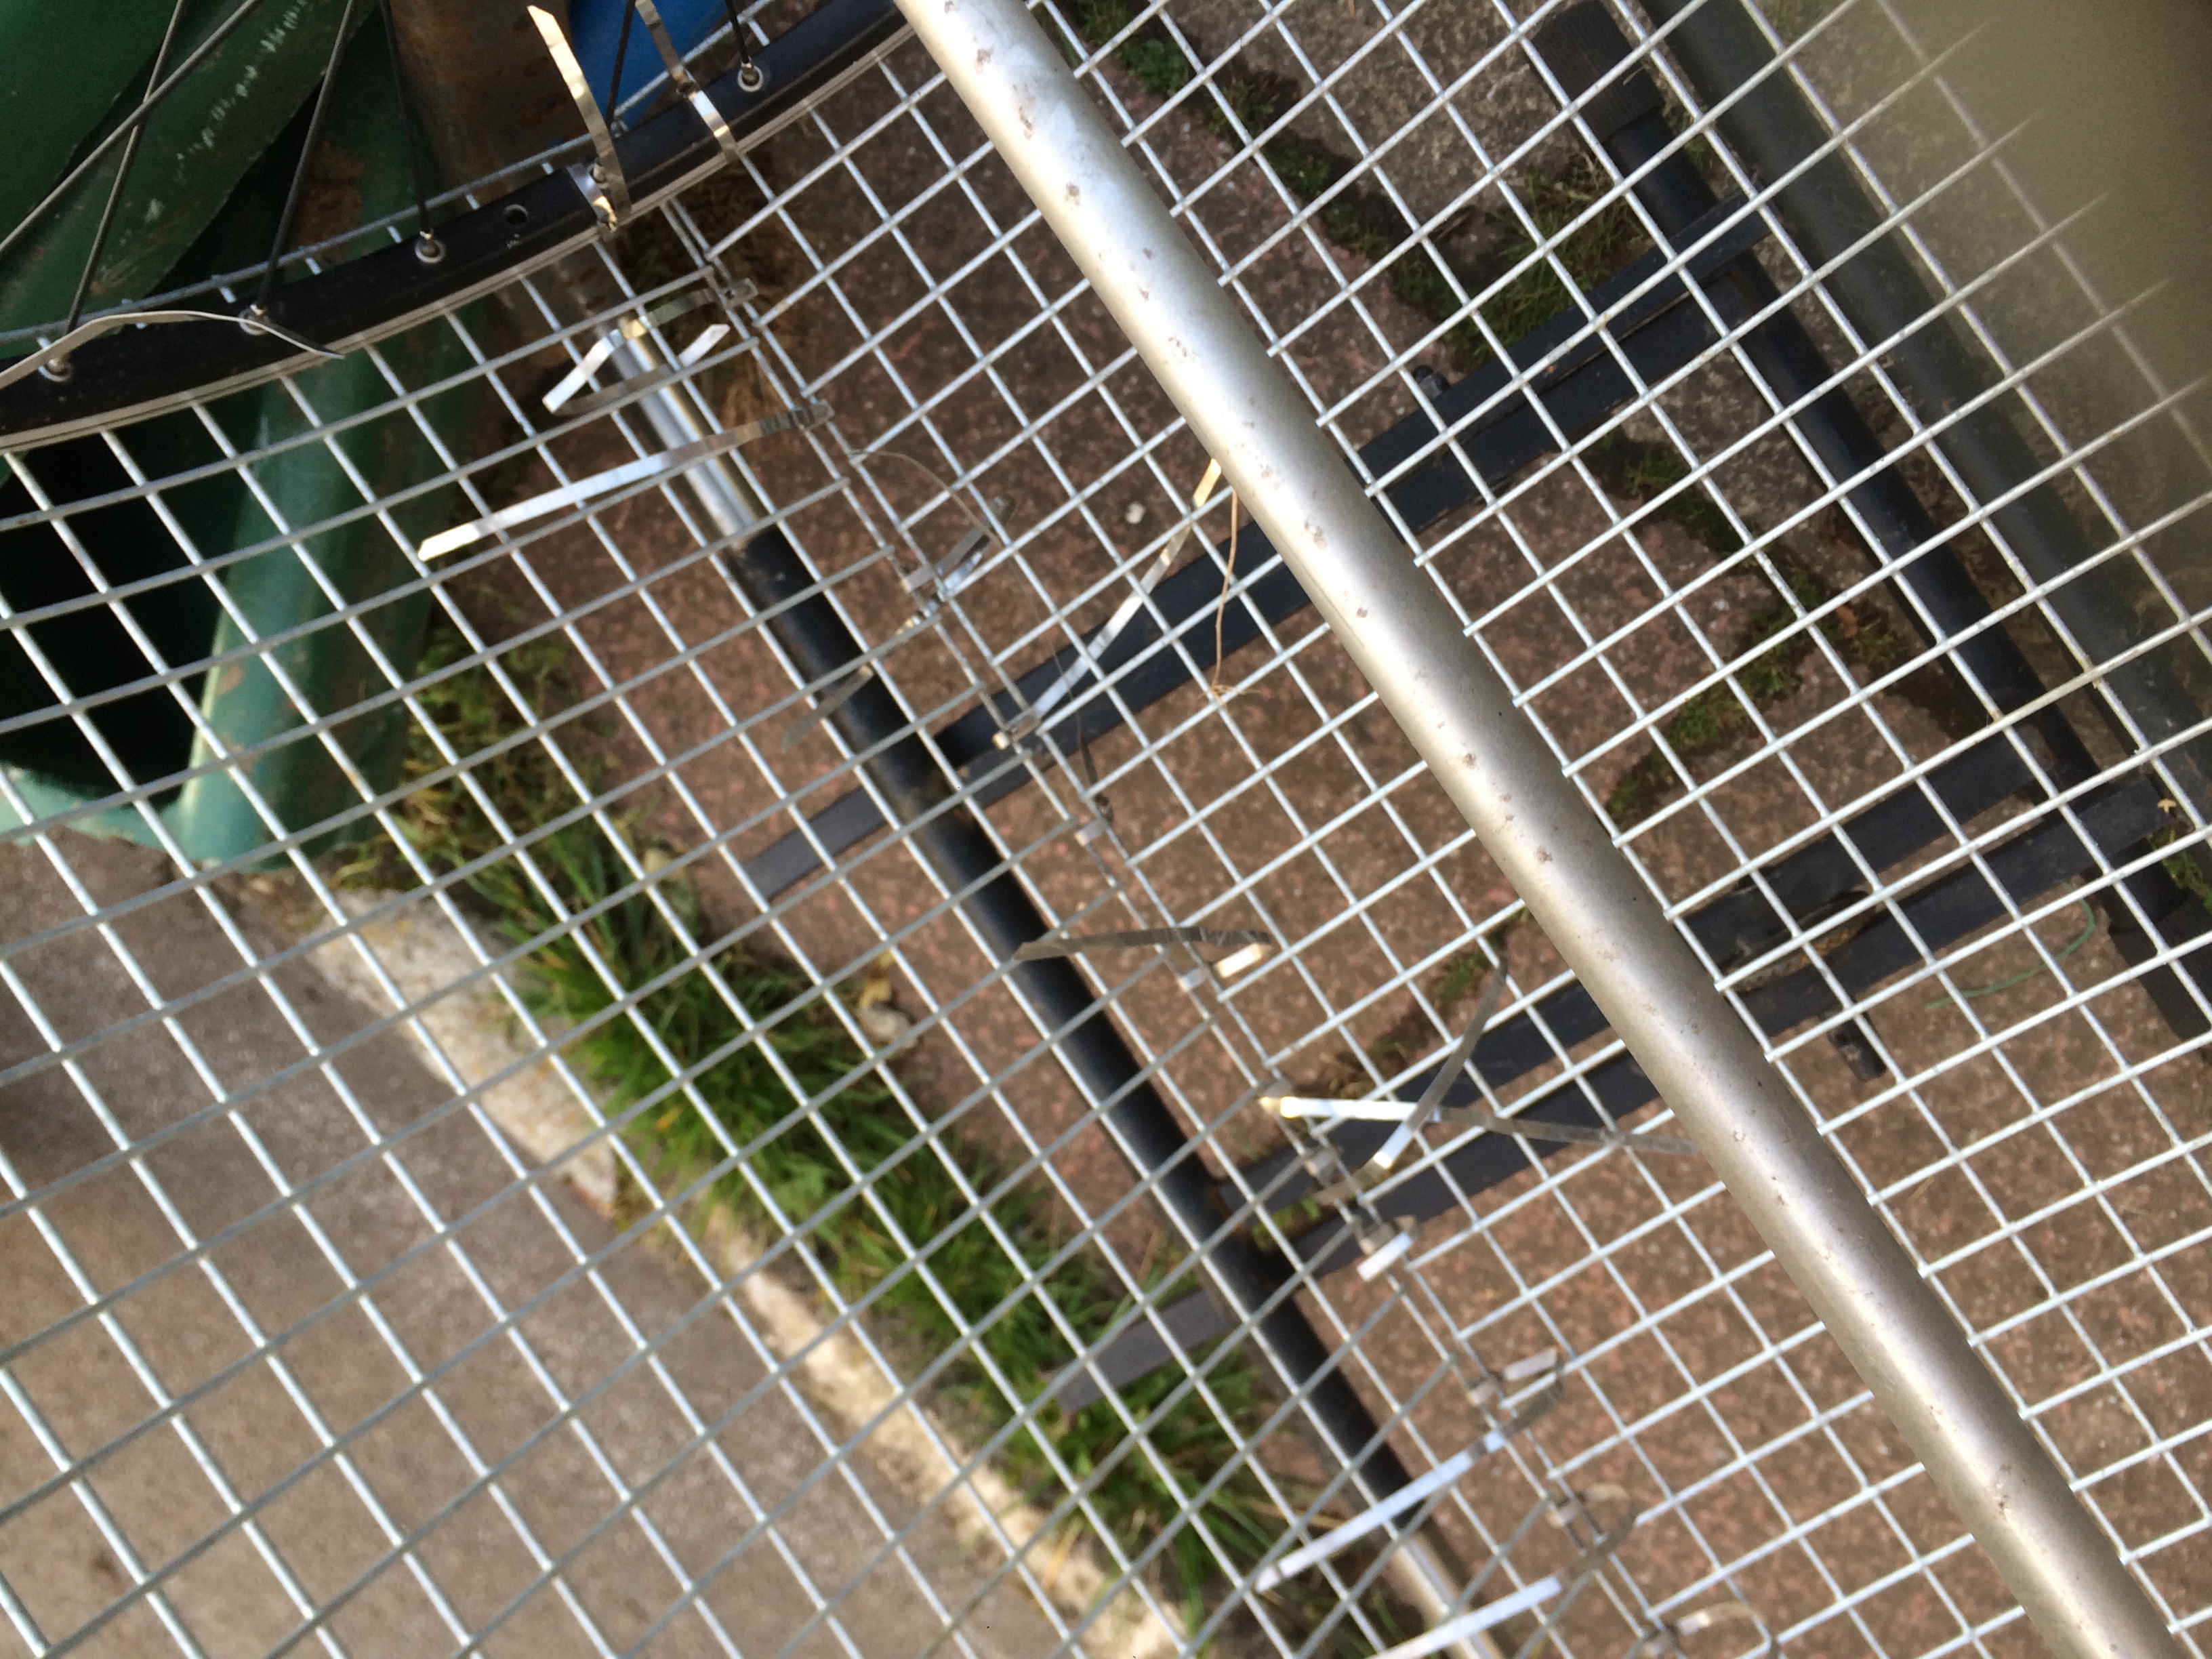
Mark-two was much quicker to construct. These new wheels are more or less the perfect size and the angle-iron and handle mechanism could be re-purposed from the first roller. The seam where the two ends of the mesh meet is cable tied with the stainless ties. I made the error of cutting the mesh exactly to the circumference of the wheel rather than overlapping the two edges of the mesh by a square or two. If it was overlapped I think the roller would have less of a ridge where the seam is and it would roll a little smoother. Nevertheless it still rolls smooth enough and the ridge is barely noticeable.
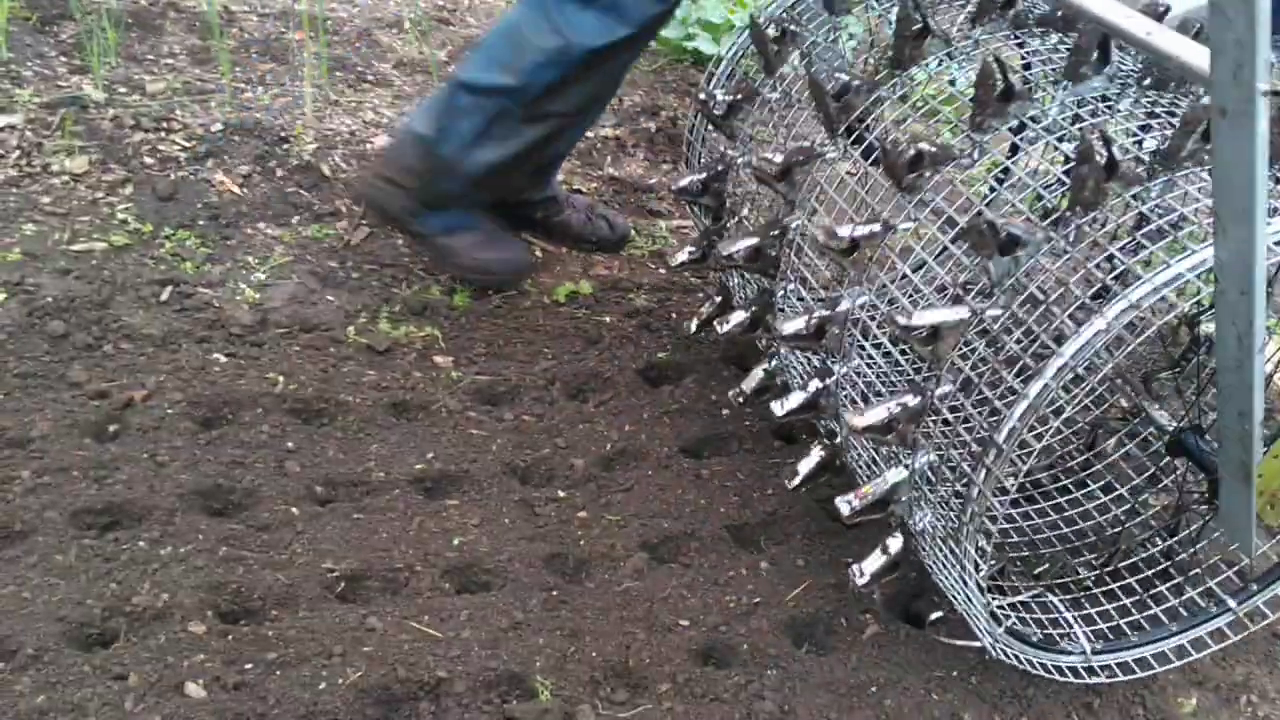
The larger roller performs much better. It is about waist height so you can use body weight to firm the soil or use a concrete block if this is awkward. Working a whole bed width produces a more even finish and it is easier to control. One person can do this on their own from the path holding the cross bar.
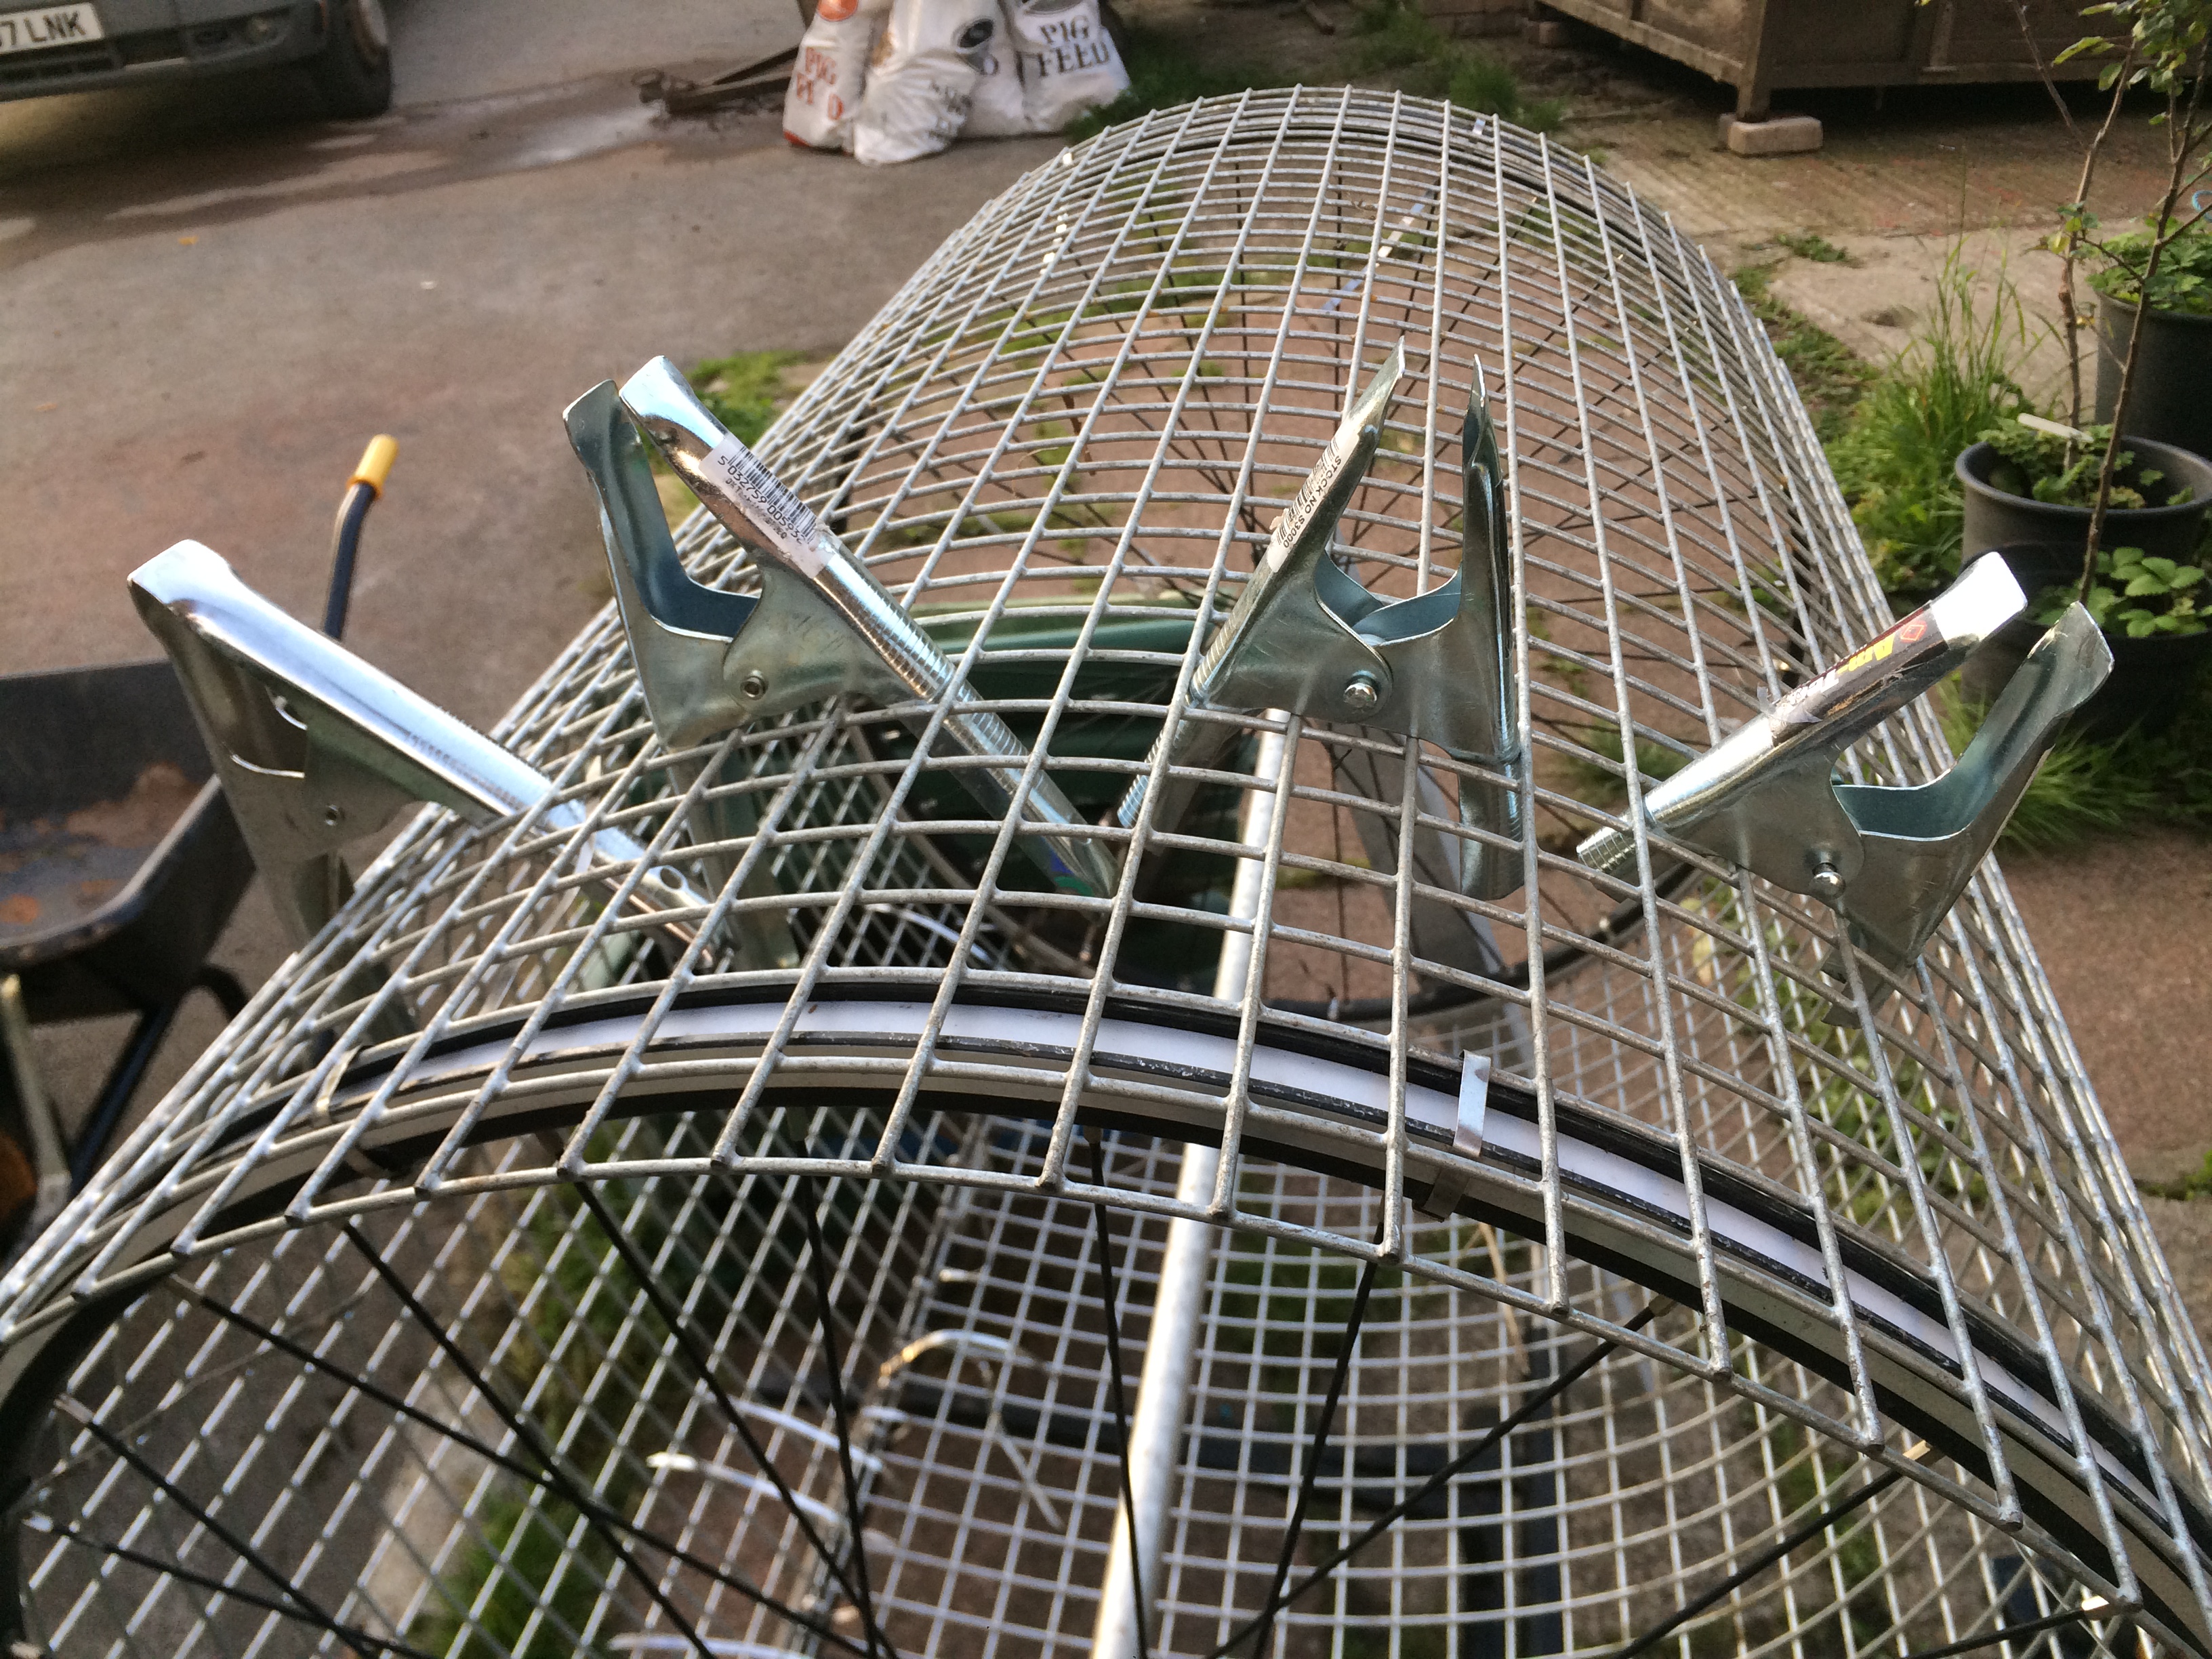
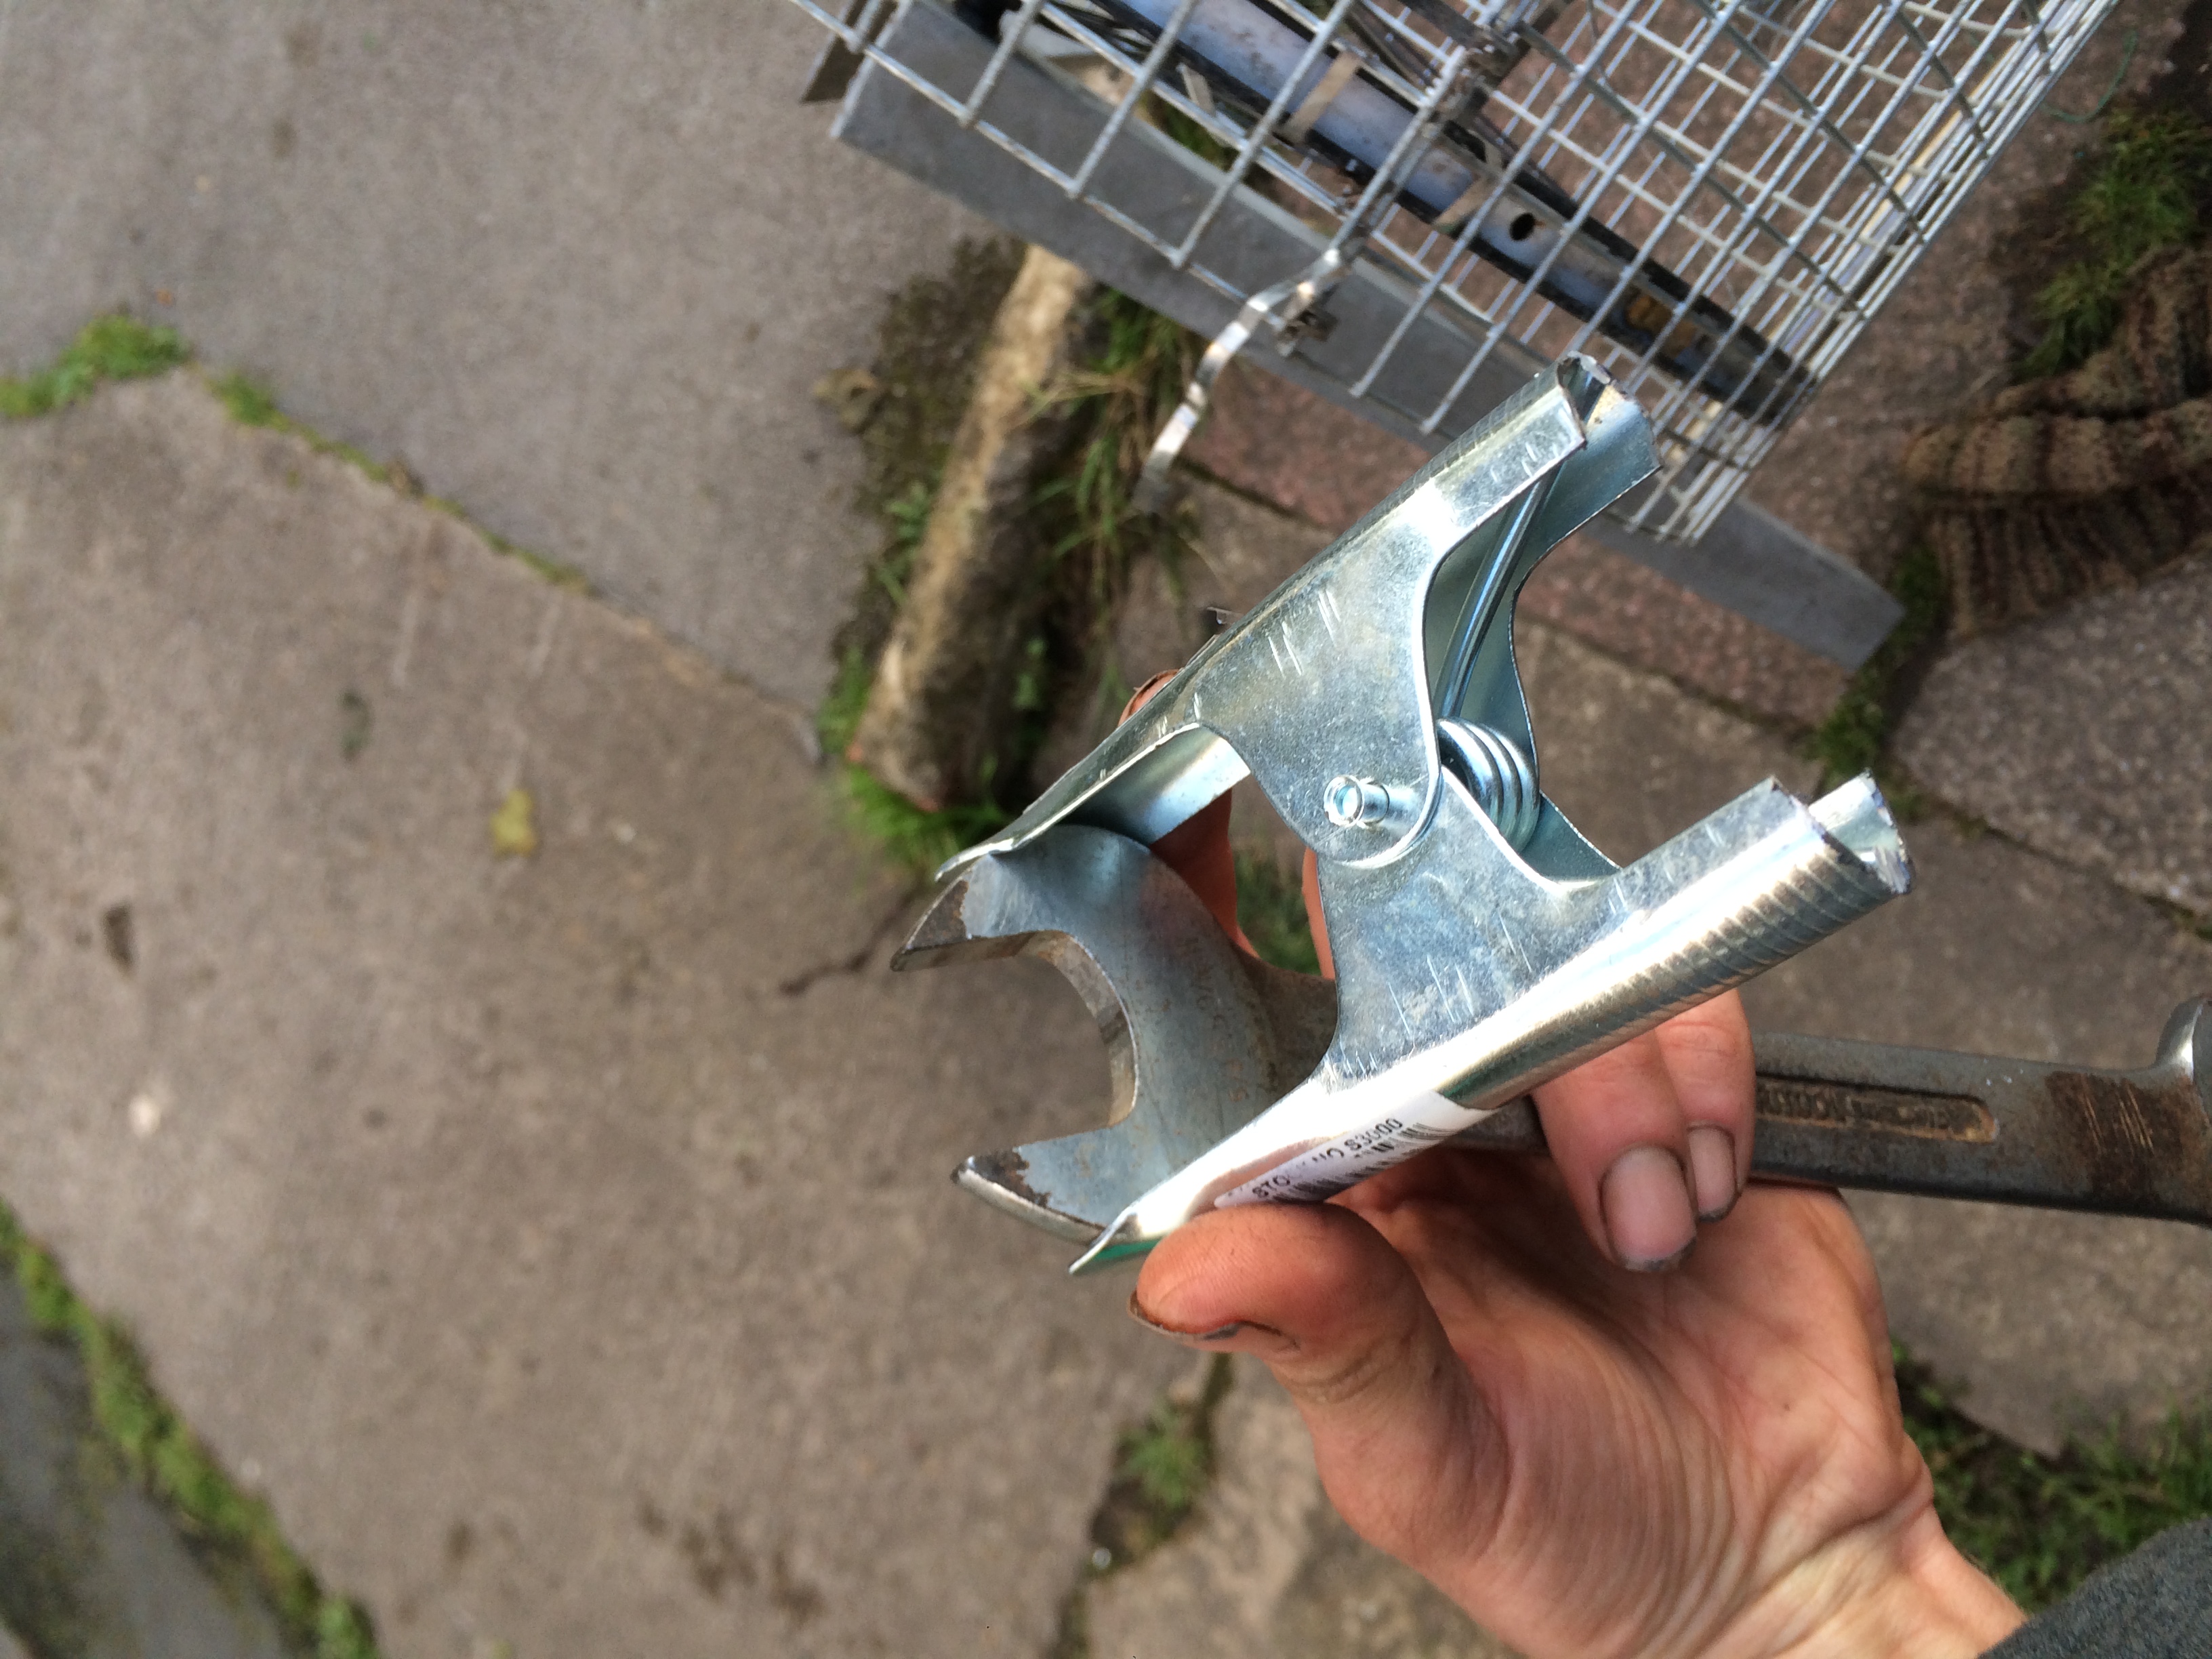
The dibbler solution manifested as heavy duty metal spring clamps used for market stalls/tarpaulins. I was able to buy sevral bulk boxes of these second hand from gumtree and ebay averaging £0.70 each. These are ether exactly 1” wide or a little wider. We squeezed them slightly narrower in a vice so that they would easily slot into the mesh. We also cut the handles down in length so that they can fit at a close spacing without contacting each other inside the drum. The spring clamp is very strong and sits in the mesh with the mouth of the clamp slightly open. This seems to create a nibbling effect on the soil and less compaction than the solid metal dibbles from Jonny’s. Fitting these clamps and extracting them is a slight challenge- we found that the best way was to hold the mouth of the clip open using a large spanner while inserting or extracting them (keeping the hand well away from the spring action!).
The roller/dibbler combo works well, it took two passes to make deep well formed holes big enough for our transplants but retracing our progress along the bed worked fine. The end result was a perfectly spaced grid of transplants.
There are some improvements/developments that I would like to make to the design: a more ergonomic handle that sticks out over the path (possibly extendable for when working a double bed); and an axle between the two wheels that uses an M10 threaded bar with a connector to the bike axle nut to eliminate the need for a metal worker to drill and tap the thread into the centre axle.