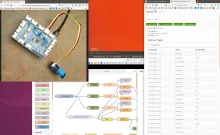
A simple way to collect data from sensors, like temperature and humidity and store it in FarmOS.
I am a farmer and I want a tool to remotely know what is happening in the environment because I can't be everywhere all the time
What functionality solves this problem?
Parts
- Raspberry Pi
- GrovePi
- Grove Temperature&Humidity sensor
- SD card (8GB or larger)
- MicroUSB power supply (2 amp or more is best)
- Ethernet cable connected to router or your computer (just for initial setup)
Steps
- Download the Raspian for Robots image. It should start downloading the latest version automatically. Currently 2017.10.05-Raspbian_For_Robots_by_Dexter_Industries.zip
- Burn to an SD card with Etcher
- Connect GrovePi to Raspberry Pi and plug in a sensor
- Put the SD card you just burned into the RPi and plug in the power
-
Connect to wifi. There are many ways to do this. I will outline 3...
- The default R4R way to do this is to temporarily plugging the RPi in via Ethernet and then navigate to http://dex.local from your computer. (Note: if you have an Ethernet port on your computer you should be able to connect the RPi directly to that but if that doesn't work then try connecting to your router) This gives you an options to log in using VNC. This opens the RPi desktop in your browser. Then open the "Wifi Setup" utility on the desktop.
- You can also just use a keyboard, mouse and monitor before you boot the RPi and use the same Wifi Setup utility on the desktop as before.
- Or by editing files on the sd card https://gitlab.com/fiot/raspbian-headless-networking-config (you would do this before step 4)
-
Install latest Node-RED
-
Open a terminal (username: pi password: robots1234) and enter this command from https://nodered.org/docs/hardware/raspberrypi
- bash <(curl -sL https://raw.githubusercontent.com/node-red/raspbian-deb-package/master/resources/update-nodejs-and-nodered)
- Answer yes to both questions
-
Then to make sure Node-RED auto starts run this command
- sudo systemctl enable nodered.service
-
Open a terminal (username: pi password: robots1234) and enter this command from https://nodered.org/docs/hardware/raspberrypi
-
Test that is is all working
- Unplug all your wires (including the power)
- Plug the power back in and try connecting to http://dex.local:1880 again. Your Pi should now be connecting to wifi and booting Node-RED automatically when it turns on.
-
Install and configure GrovePi sensor nodes
- Go to the menu > Manage Pallet > Install and search for "node-red-contrib-grovepi"
- Click install (twice) and wait for it to finish
- Add a "Grove digital sensor" node and edit to select the connected GrovePi board and sensor.
- Add a "debug" node to the flow, connect to the sensor and deploy
- Open the debug tab and confirm you are seeing readings coming through
-
Create a new sensor asset in FarmOS
- Create a new sensor asset in FarmOS
- Select "Listener" under "Sensor configuration > Sensor type"
- Open "Developer Information" and copy the "URL"
- Click "Save" (The senor asset does not work until it is saved for the first time)
-
Send sensor readings to FarmOS
- Drag an "http request" function node onto the flow (not the "http response" output node does not work in this case) and connect the "grove digital" node to it.
- Double click to edit, select POST for the method and paste in the FarmOS senor URL.
- You will probably want to change the "Interval" for the sensor. By default it reads every second. Once every 15 or 30 seconds might be ok for short term testing while you develop but 5 minutes is probably fine in most cases.
- Deploy again and visit FarmOS to see the data roll in!
Additional optional setup
Remote access
If you are installing the raspberry pi is not connected to the same wifi network you are normally connected to it can be helpful to be able to access it remotely for managing updates, changing settings, fixing problems, etc. Since Node-RED is a graphical program, I have found TeamViewer to be the simplest secure way to get remote desktop access to the Pi. It is not open source, but it is free for noncommercial use. If you just want to log in via ssh, then Pagekite is a good solution but it costs money unless you host it yourself.
TeamViewer
- Log in to the desktop using a keyboard/mouse/monitor directly connected to the Pi. Not sure why this is the only way it works to install, but after it is installed it will run headless.
- Download https://download.teamviewer.com/download/linux/teamviewer-host_armhf.deb
- Open the downloaded .deb file and it should ask if you want to install it.
- This video is a bit old but it walks you through the basic process of getting TeamViewer installed and connected to the Pi from your computer https://www.youtube.com/watch?v=vr3Gf8vnKAg
Pagekite
- Setup an account on https://pagekite.net/
- Follow https://pagekite.net/wiki/Howto/GNULinux/DebianPackage/ to install Pagekite
- Follow https://pagekite.net/wiki/Howto/GNULinux/ConfigureYourSystem/#sshbe to configure for ssh
- Configure your ssh client (openssh for most people) https://pagekite.net/wiki/Howto/SshOverPageKite/#openssh
The first 3 steps are contained in this Ansible script if that is helpful for anyone.
