

Drip Line Installation Tool for Between Mature Crops
Problem Statement/functional need:
When you've taken too long to install drip line between rows the plants may likely close the gap making it difficult and damaging to install the irrigation. This tool makes this process fast, easy, and gentle on your crops.
How it works:
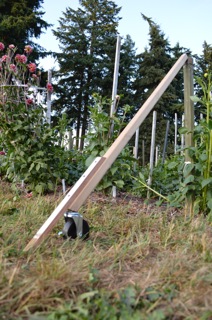
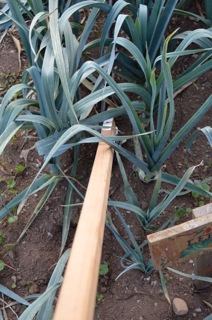
By attaching the drip line to the tool you can pull the drip line through the crop at ground level where it is desired. The large wheel makes it easy and quick to roll along soft and bumpy soil. The long nose runs right along the surface of the soil ensuring that foliage does not get caught in the wheel and is gently lifted up so the drip line is under the plant and directly in contact with the soil. Once the drip line is attached you simply walk with the tool as if you were walking a dog.
How to use the tool
Attach the drip line.
Walk with tool as if you were walking a dog.
Detach drip line from tool and connect to water supply.
Materials (The concept is more important than the materials. This tool can be created with a wide variety of materials but here's what I used.
5 ft long dowel, tool handle, or 2x2 piece of lumber (I used part of an old hand rail)
18" strip of 1" wide 3/4' plywood
4 inch or larger fixed wheel castor
2 3" nails (or anything you can dream up to attach your drip line to the hand)
3 screws
How to Build:
- Cut a 45 degree angle at the very end of your handle
- install castor to the bottom of handle
- Cut head off two nails and bend into a soccer goal shape
- Hammer nails in to the back of the handle just above the wheel. Perpendicular to the handle and parallel to each other about 2-3" apart. Leave a 1/4 gap between the nail and handle so you can slide the drip line through.
- Cut 18" strip of wood so there is a bit of a pointy nose at one end.
- Determine the angle that is comfortable for you to hold the tool. This will determine how far down to install the nose.
- Use 3 screws to attach the wooden nose to the lower end of the tool